Your Guide to DKIM Configuration for Better Deliverability
DKIM configuration involves several key steps to improve your email deliverability. First, generate a public-private key pair through your email service provider. Next, add the public key as a TXT record to your domain’s DNS settings. Finally, enable email signing on your sending platform.
This authentication setup allows receiving mail servers to verify that your emails are authentic and haven’t been altered. Properly configured DKIM records build sender trust, prevent spoofing, and ensure your messages pass the security checks required by major providers, significantly reducing the chances of landing in spam.
What is DKIM?
DKIM acts as a digital signature for your messages. It provides a reliable method to verify sender identity and ensure message integrity throughout the transit process.
- It acts as a digital signature for all outgoing emails.
- It verifies your sender identity to receiving mail servers.
- It ensures email integrity by proving the message content remains unchanged.
DKIM helps mailbox providers confirm emails are legitimate and untampered.
How DKIM Works (Simple Technical Breakdown)
Understanding the underlying mechanism helps you avoid common configuration mistakes. The process relies on asymmetric cryptography to validate messages automatically. Consider these fundamental operational steps:
- Private Key Signing: A unique private key automatically applies a digital signature to every email you send. This signature is hidden within the email’s code.
- Public Key in DNS: You publish the matching public key as a DNS record for your domain. This makes it accessible to any receiving mail server.
- Signature Validation: When another server receives your email, it fetches your public key from the DNS to verify the email’s signature. This confirms you are the true sender and that the message hasn’t been altered.
If the signature is valid, the receiving server knows the email is authentic and hasn’t been tampered with. This builds trust and ensures the email is delivered to the recipient’s inbox.
Step-by-Step DKIM Configuration Guide
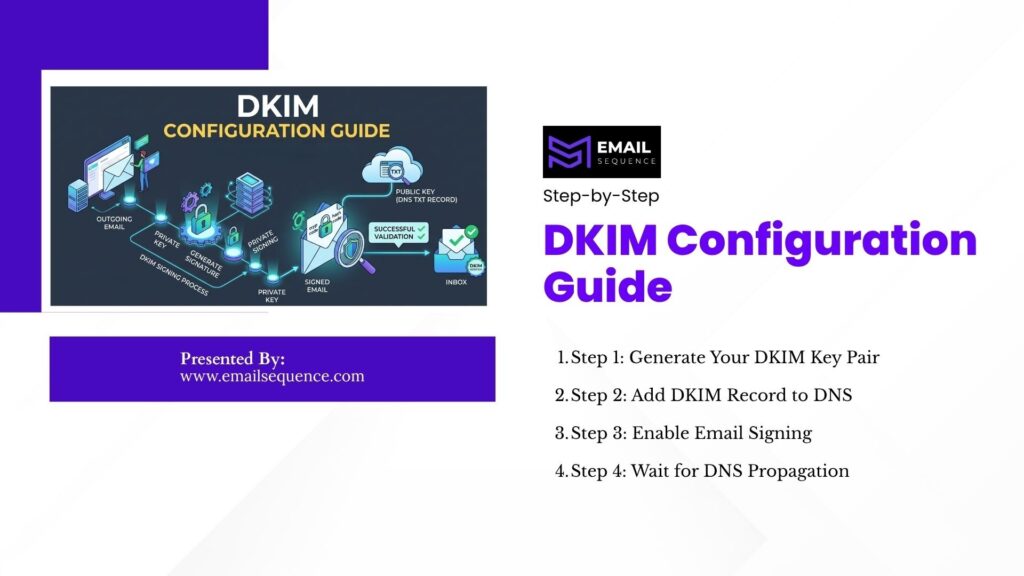
This is the exact process used across all major email platforms. Following these steps ensures a secure and functional setup.
Step 1: Generate Your DKIM Key Pair
You need to create the cryptographic keys that make this protocol function. Most email service providers offer built-in tools to handle this generation. Keep these requirements in mind:
- Create a matching public and private key pair.
- Use provider tools or server commands to generate the keys securely.
DKIM relies entirely on these cryptographic key pairs to function.
Step 2: Add DKIM Record to DNS
You must publish your public key so receiving servers can find it. This requires access to your domain registrar or DNS hosting provider. Ensure you complete these actions:
- Add a new TXT record to your DNS management panel.
- Include the designated selector and the public key data.
Your DNS stores the public key for ongoing verification checks.
Step 3: Enable Email Signing
Your sending platform needs permission to attach the signature to your messages. You must explicitly activate this feature within your email service provider settings. Take these steps:
- Activate DKIM in your ESP dashboard (like Gmail or SendGrid).
- Ensure all outgoing emails are actively signed before sending.
Step 4: Wait for DNS Propagation
DNS changes do not happen instantly across the global internet. You must allow sufficient time for servers worldwide to update their records. Remember these timing factors:
- Propagation may take a few hours to a full 48 hours.
- Always verify the records are live before sending major campaigns.
DKIM Records Explained (What You’re Actually Adding)
Most users copy and paste records without understanding their components. Breaking down the syntax helps you identify errors quickly. Pay attention to these specific elements:
- The selector (e.g., mail2024._domainkey) identifies the specific key.
- The version tag (v=DKIM1) specifies the protocol version.
- The encryption type (k=rsa) indicates the cryptographic algorithm used.
- The public key (p=…) contains the actual string of characters for validation.
A clear understanding of these records is crucial for preventing catastrophic configuration errors. Getting any of these elements wrong could lead to widespread email delivery failures, impacting your entire communication strategy.
How DKIM Improves Email Deliverability
Proper DKIM configuration directly impacts your inbox placement rates. Mailbox providers use this data to calculate your overall sender score. Notice how this protocol improves your metrics:
Building Long-Term Sender Reputation
DKIM is foundational to establishing trust with major mailbox providers like Gmail, Outlook, and Yahoo. By consistently signing your emails, you create a verifiable history of legitimate sending behavior.
This positive track record contributes to a higher sender score, signaling to providers that your messages are wanted and can be safely delivered to the primary inbox.
Reducing the Risk of Spam Filtering
Aggressive spam filters are a major hurdle for marketers. A valid DKIM signature acts as a powerful signal of authenticity, differentiating your emails from unsolicited spam.
This significantly lowers the probability that your messages will be automatically flagged and sent to the junk folder, ensuring your content reaches its intended audience.
Preventing Brand-Damaging Spoofing Attacks
Spoofing is when malicious actors send emails that appear to come from your domain, often to phish for sensitive information or distribute malware. DKIM makes it nearly impossible for unauthorized senders to impersonate you successfully, as their messages will lack the cryptographic signature that validates your identity.
DKIM + SPF + DMARC: Why You Need All Three
DKIM alone does not provide comprehensive protection in modern email environments. You must implement a complete framework to guarantee optimal deliverability. Consider how these protocols interact:
- SPF validates the specific sending server IP address.
- DKIM validates the message integrity and sender identity.
- DMARC enforces a strict policy based on SPF and DKIM alignment.
Think of it like a three-legged stool: if one leg is missing, the entire structure becomes unstable. For email, this instability means a higher risk of your messages being flagged as spam or rejected outright by receiving servers.
DKIM vs SPF vs DMARC (Quick Comparison)
This reference helps clarify their distinct roles within your infrastructure. Review the differences carefully to understand your overall setup.
| Protocol | Purpose | What It Verifies | Impact on Deliverability |
| DKIM | email signing | message integrity | high |
| SPF | sender validation | sending server | medium |
| DMARC | policy enforcement | alignment | very high |
How to Check If Your DKIM Configuration Is Working
Initial setup is entirely useless without proper verification. You must confirm that receiving servers actually recognize your signature. Perform these validation checks:
- Inspect Email Headers: Send a test email to an account you control (like Gmail or Outlook). Open the email, find the “show original” or “view message source” option, and search for Authentication-Results. You should see dkim=pass. This confirms that the receiving server successfully validated your signature.
- Utilize Online Validators: Use free tools like those from MXToolbox or Dmarcian. Enter your domain name and DKIM selector to check if your public key is published correctly in your DNS records. This helps diagnose any DNS propagation issues.
- Send Tests to Major Mailbox Providers: Send your email to different services (e.g., Gmail, Outlook, Yahoo Mail). This ensures your DKIM signature is recognized across various platforms, as some may have stricter validation rules than others.
Avoid These Common DKIM Configuration Mistakes
Most deliverability issues stem directly from minor misconfigurations. Even tiny syntax errors can cause total authentication failure. Watch out for these frequent blunders:
- Incorrect DNS record formatting or syntax errors: Even a small typo in your DNS record can cause authentication to fail. Double-check your formatting.
- Using the wrong selector name: Make sure the selector name in your DNS panel matches the one provided by your email service provider (ESP).
- Forgetting to activate email signing: After setting up DKIM, you often need to enable it within your ESP’s settings.
- Sending emails too soon: It can take time for DNS changes to propagate across the internet. Wait for full propagation before you start sending emails.
When DKIM Fails: Troubleshooting Guide
If your emails still route to the spam folder, you must investigate immediately. Start by analyzing the technical data attached to your messages. Review these critical troubleshooting steps:
- Check if DKIM shows as “fail” within the raw email headers.
- Verify that your DNS records are actually resolving publicly.
- Look for conflicts caused by using multiple sending platforms simultaneously.
Fix your authentication before attempting to scale your email campaigns.
Final Insight
Implementing a proper DKIM configuration is no longer optional for modern businesses. It serves as a strict requirement to ensure your messages bypass spam filters and reach your audience.
Properly configured DKIM records ensure your emails are trusted, delivered, and protected from malicious spoofing attempts. They form the vital backbone of your modern email infrastructure. Review your current email signing status today and update any outdated domain keys to maintain peak email security.
Take the time to audit your DNS settings immediately and secure your sending reputation for the long term. For expert guidance on optimizing your entire email infrastructure, from DKIM configuration to crafting high-converting messages, contact us at emailsequence.com.
Frequently Asked Questions
What is DKIM configuration?
DKIM configuration involves creating cryptographic keys and adding a public key to your domain’s DNS records. This setup enables email signing, allowing receiving servers to verify the authenticity and integrity of your messages.
How does DKIM improve email deliverability?
DKIM proves to mailbox providers that your emails are legitimate and haven’t been tampered with. This verification increases your sender reputation, which in turn reduces the likelihood of your messages being filtered into spam folders.
Where do I add DKIM records?
You should add DKIM records as TXT records within your domain’s DNS settings. This specific location ensures that receiving mail servers can easily find and access the public key required for the verification process.
How do I know if DKIM is working?
To confirm that your DKIM setup is functioning correctly, you can inspect the headers of a sent email for a “DKIM=pass” status. Alternatively, various online validation tools can check your DNS record and signature.
Can DKIM alone prevent emails from going to spam?
While DKIM is crucial for sender authentication, it cannot single-handedly guarantee inbox placement. For optimal email deliverability, it must be used alongside SPF, DMARC, and consistent adherence to reputable sending practices.